Thursday, December 26, 2013

Life Project props GIVEAWAY!!!!

It's been AGES since I run a giveaway  and I feel that this is the perfect time to through one :)
Usually, I offer an item from my fashion shop or kid's shoppe,but this time I want to do something different-I'm going to give away  a small  handmade treat made especially for the upcoming
"Documented Life Project" ,which will start in the beginning of  the new year ( and you still have time to sign up if you haven't done it yet )...

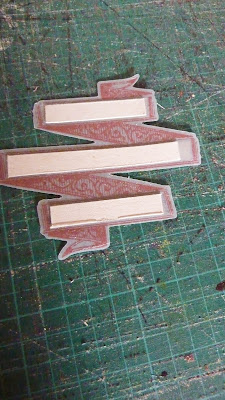
For this occasion, I whipped up a cool little set of 12 months dividers/ tabs STICKERS ready to use with your new 2014 planner .
In addition , I made a small sampler of seem to be MUCH loved handmade washi tape which I'll gladly add to the bundle :)
AND to sweeten this deal even more ,I decided to add a  sweet little cherry  on top-I'm going to hook you up  with a brand new gadget from XYRON!!!!
 Prepare yourself to be the new owner of  the cutest little adhesive applicater - the pink Mini Tape Runner + some more surprises ....


The lucky winner not only will get to have this lovely oriental set, she/he will have a little part of my actual house on it :D
I bet now you are REALLY curious what am I talking about,right ?1
Well,these tabs are made of  upcycled cardstock sheets by DCWV  from the "The Far East" stack, which only a month ago were wallpapered to my studio wall!
see if you can find the sheets that the tabs were cut from :D
Anyway,after thinking things through,I decided to remove these beautiful sheets from the wall and continue with my mural and use the cardstock +  little bits of plaster, to make these awesome tabs for YOU!

The handmade washi tape was made using origami paper and Xyron Creatopia machine  loaded with repositionable adhesive cartridge 

So now even if you won't win this set,you'll know what I  used to make it with and can use my rounded edges tab template to whip up some cool tabs yourself - use the PNG file with your cutter machine to cut some personalized month dividers using your own art or decorative cardstock like the above^

So how one can win this lovely set of Dividers+ handmade Washi + Mini Tape Runner by Xyron you ask....with a few VERY simple steps:

1. Check out my etsy shops and tell me via comment here on my blog  what item you liked best from each one of my shops

PettiBear- Made to Measuremnts Fashion & OOAK Accessories
PettiBearKIDS -Eco Friendly KIDS Fashion ,Toys, Bedding & Decor
TiamatDesign-Digital Templates and Graphic Home decor

2. Like my Facebook Pages
PettiBear
PettiBearKIDS

EXTRA points-
3.Subscribe to my monthly Newsletter
4.Share this Giveaway with your friends via social media-
Facebook ( tag me -Viki Tiamat ) ,Twitter (@PettiBear)

The Winner will be announced on New Years eve ( IST time)
GOOD LUCK!


bear_hugs

Vows Renewal Inspiration

I LOVE this Bohemian style wedding video!!

The PERFECT way to renew ones vows -
Intimate with a small group of your closest friends and in such a beautiful setting!
 Me and the hubby will celebrate our 10th wedding anny in two years...I shall remember this post for then :)
And we already live in a perfect spot- only 5 min drive to the place we originally got married, near this  gorgeous sea shore -a Beauty at it's best (see the distant hill at the horizon -that was our wedding venue )
Now all is left is to wait a little bit (2 years shall fly fast) and  I would do it exactly like this ,right on the beach :)
bear_hugs

Wednesday, December 4, 2013

MAGIC Box DIY tutorial

In a Hanukkah holiday spirit, today I want to show you how to make a Magic Box or as it may known better-an Exploding box.
 However you want to call it,I love this collapsing box idea and made a pictorial for you to try it on

 photo exploding_box_slide_zpscaacab29.gif
To make one of your own you'll need-
Two 12X12" double sided decorative cardstocks-I used Cratepaper "Bundled Up Candy Cane" #683231 stock for the box
 and
 American Crafts Peppermint Express Ornamint 366092 stock for the lid 

Lets begin-
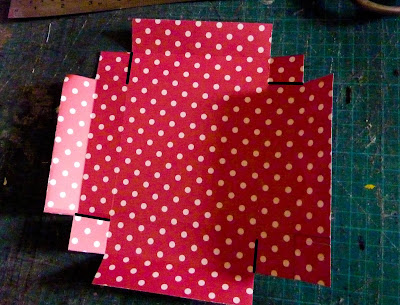
Divide the cardstock into 3 equal sections  -score 2 straight lines from each point
 
 Turn the paper 90 degrees and do the same steps above to receive a total of  9 equal squares 
 Cut off the corners from each end
 And you have a ready base of your magic box.
Now lets make the lid for your box
 To make a lid we'll need to cut our stock to measure  8.4X8.4" 
Score 1"+1" on all sides 
Cut off 3 of the top little squares  on each side
Add 4 more small cuts as shown^^ 
And you're ready to  fold the lid

 The Magic Box is ready
Now we shall decorate :)
Since we need our exploding box to collapse ,we must add weight to the walls  .
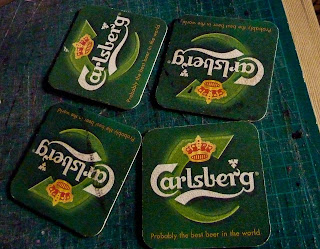
To achieve this I upcycled 4 beer coasters that I decorated and then glued to the base we just made
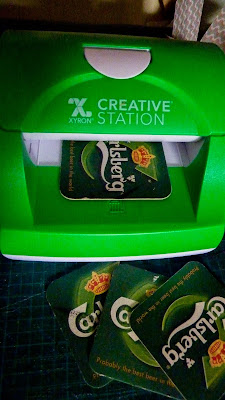
Use your XYRON  5" or 9" Creative Station  to apply adhesive on one of coaster's sides
Do so with all 4 coasters  
Remove the protective  film and run the coasters one more time through your Creative Station, to apply glue on reverse of all the coasters 
 Peel of one of the sides and adhere 4X4" square of decorative cardstock on each of the four coasters 
First coaster  received the reverse side of the cut offs from our base ( Bundled Up "Candy Cane)
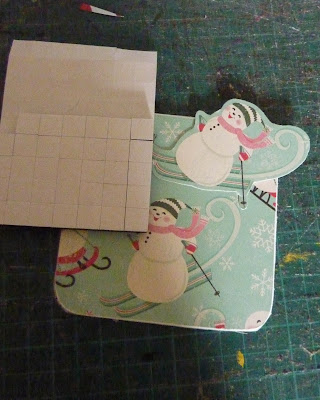
With second coaster I used Cratepaper Bundled Up "Snowmen"   double sided cardstock
I liked the whimsical skiing snowman  and decided to add it some dimension by using Teresa Collins's foam glue squares   .
Cut a snowman twin and then stick it above the existing on the background skiing dude
Raising the little fellow almost gives it a feel of real movement 
Peel off the protective paper from the back of the coaster and glue it onto the base 
Now continue to the next coaster 

Using my XYRON 3" Sticker maker  I apply glue on my vellum journaling die cut
Add  simple rectangulars to the areas I want to write on   
Placed 3 pieces of XYRON 6mm Double Sided tape  on top of the rectangulars 

And glued the shape in place
See how it's sheer in the areas around  the text blocks,but opaque in places where you actually might want to write something
For the third coaster I used  Peppermint Express "Dear Santa" 366095 cardstock
And decorated it with stickers from American Crafts "remarks"   accent & phrase 
The reverse side of  "Dear Santa"went to the 4th coaster 
I wanted to make a little money pocket to decorate this panel  with
Used a template to cut a festive pocket  using Doodlebug Design "Home for the Holidays" cardstock
Assembled it with my XYRON Mega Runner
and used my XYRON 3" Sticker Maker to glue it in place 
Added some present stickers from the same "remarks" sticker set I already used with my 3rd decorated square  and we are DONE :)


 Uh wait....I also added a cute little Santa to my second coaster square in the end ;)
It came from "remarks" set as well
 AND a family photo in the middle
The paper frame came from Heidy Swapp
 To hide the white border of the photo, I used Heidy Swapp's paper flowers 
Glued them on with the awesome XYRON 10 mm Glue dots

 And TA DA
Let the FUN begin!!!!
 closed
opened 

 P.S
After I finished the box,I decided the cut out snowmen were bothering to the eye ,so I decided to cover them with some stickers and felt much better afterwards :D
before 
after
'You Are Sweet' "doodle quotes"  bubble and Sprinkles came from Doodlebug Designs 
and the red tree from bug's ICONS cardstock stickers
 Lastly, I upgraded the lid with AC "remarks"  (used above) ornament  and Doodlebugs "fancy frills" trim

AND now I'm HAPPY!
Happy Hanukkah and Merry Christmas to you all 

bear_hugs