Sunday, May 27, 2012

Shavuot at the Kinder Garden- Thursday Hairdo

 Sierra had celebrate the Shavuot Holiday in her kinder garden with a Tired Lace dress and Bow Bun hairdo

Bow Bun
Tired Lace and jersey dress+matching headband with vintage flea market finds

Sierra with her friends
They all were so cute wearing their white gowns and flower tiaras in their hair,that I couldn't help myself- little ladies for you :)
bear_hugs

Each Day Different Hairdo-Saturday

Today is the first day of Shavuot Holiday and it happens to by my father in law's Birthday..so of course we have a great reason to dress up fancy ,make our hair pretty and go burn the city :D
Sierra is wearing her couture Emerald Green Tie dress and Waterfall French Braid

Waterfall Braid
bear_hugs

Tuesday, May 22, 2012

Refashion #II -Men's shirt to Women's Peplum Blouse

A few days ago I showed you how you can easily refashion your old shirt and give it a new life...Now I want to show you that not only your old blouses can be restyled ,but you can use your boyfriend's shirts as well!

This time,my task is to make a Peplum Blouse out of men's Oxford shirt
To begin with this project I'll need two XL or XXL if available men's shirt (you'll see why two later)

You'll need  a basic sloper of your size
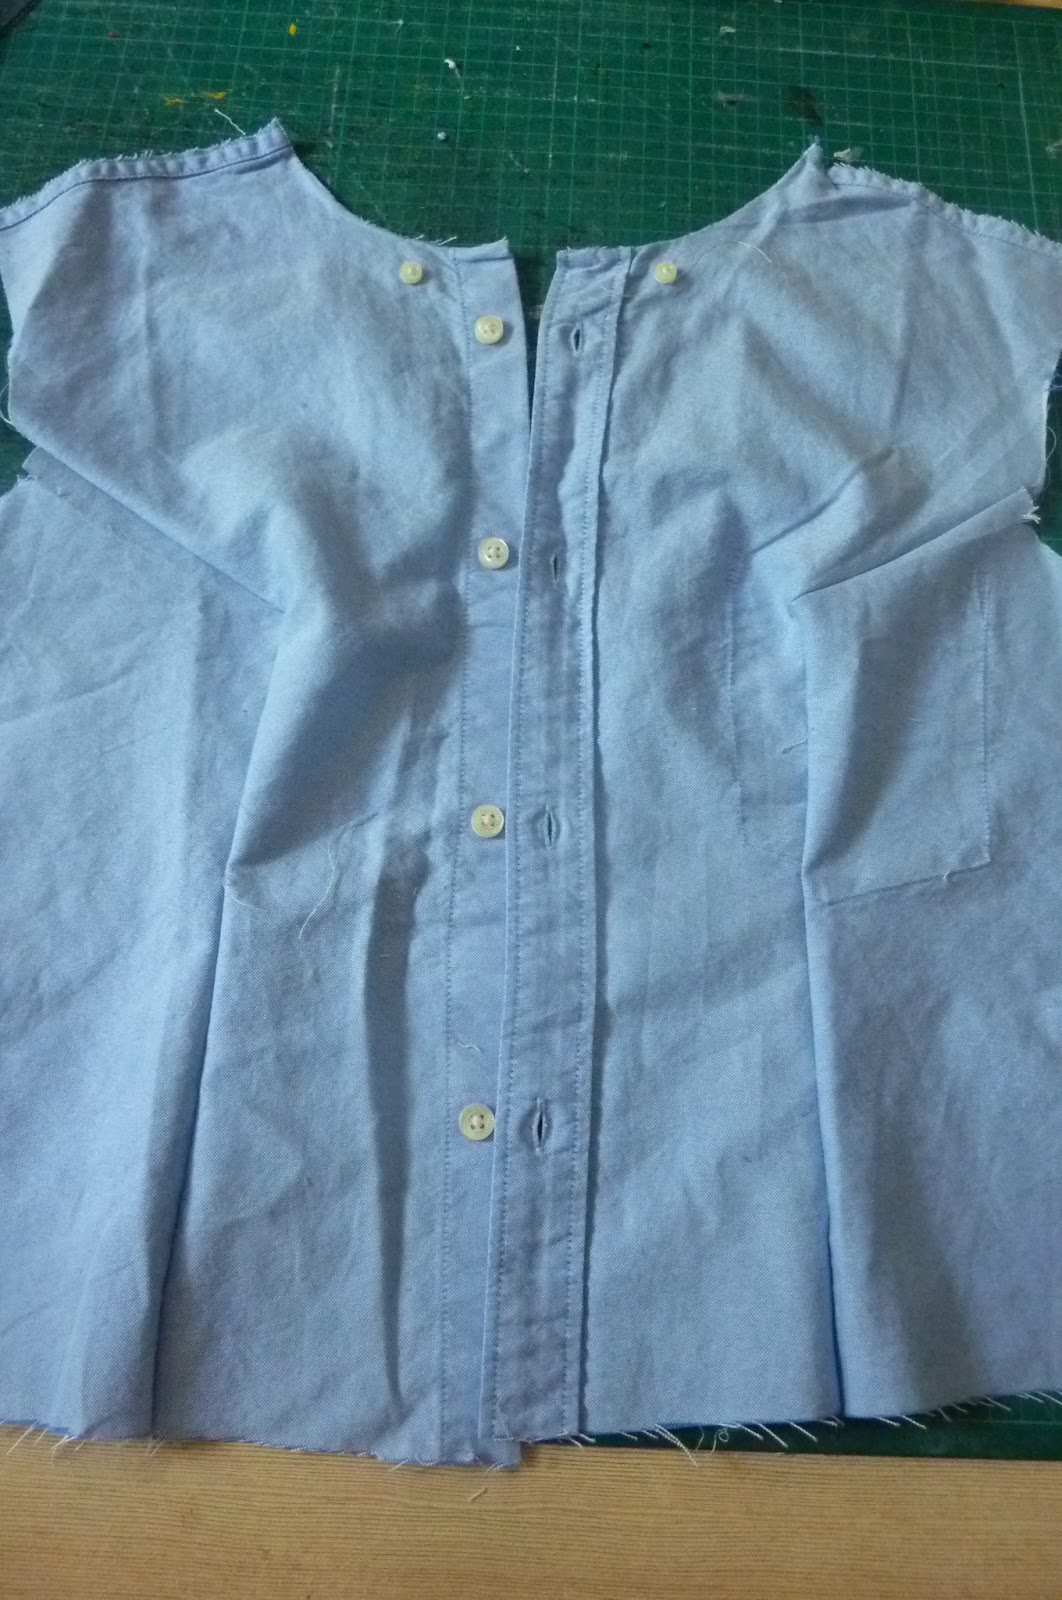
Put it on your shirt and estimate the right placement you can cut the pattern of -I myself decided to cut it lower then the actual shoulder seams were (see second pic) and to save the reinforcement shoulder piece of the shirt to decorate my new blouse with

Carefully cut off the sleeves ,sides,collar and under the reinforcement to get your "fabric"
Place your pattern in the center of the placket and cut the front pieces
Mark and sew the darts
Cut the back
Mark and sew the darts
Decide where the right placement of the reinforcement on your new shirt will be
Pin it to place on the back and flip it over so you can match the front pierce
Remember that you haven't sewn the shoulders together so you have 1/2" seam allowance to take into consideration !!!
Fold the allowance in on itself as if you had sew it ,do the same to the front pieces
Put both shoulder parts close together and cut the excess of the reinforcement piece to match the cut edges of the new pattern

Sew the reinforcement piece to it's place
Cut the peplum piece of the second men's shirt you have-1 XL shirt's back was enough to cut a seamless full peplum for a size L women's shirt!
Treat the edges with bias tape or make narrow double rolled hem all around but the waist
Sew the peplum to the shirt
Now sew the collar back to the neckline
I had a small hick up at that area-my original pattern's neckline was wider then the standard men's collar ,so I had to improvise ...I used the collar from the second shirt I previously cut for the peplum,and pieced both collars together to complete the 10cm gap I had in my original to short collar (you can barely see the seams on the back ,yet the impro had actually created a very cool doubled new collar )
Cover the raw seams with bias tape for a neat finish

Here I forgot to take pictures of the process,but to make the new sleeves you just follow the same steps as with the bodice stages aka cutting the original sleeve open...removing the cuffs...placing your blouse's sleeve pattern on top and cutting the new sleeves (you may experience some difficulties  with the sleeve's placket but with some jiggling I sure you'll manage )
When your sleeve is sewn together,sew the cuff back on.
NOTE- the cuff of men's shirt will be bigger then women's sloper but,I decided to leave it as is and let it overlap for an additional interest-you just need to replace the original button farther then it was or leave it as is for a more roomy style
Et Vu a La  AWESOME  new oxford Peplum Blouse
bear_hugs

Friday, May 18, 2012

Operation Upcycle MY SOFA

Remember,I already told you earlier in one of my posts about my white IKEA sofa and how it is TOTALLY wrong to buy white couches when you have kids <----click here for the post 
Well, one lovely April morning ,I saw this "Operation Upcycle MY SOFA" contest post on a timeline of one of my FB friends and immediately decided to join in, as I have (hopefully,not for long) the most STAINED IKEA sofa EVER .

The rules were simple (see beyond) 
So I collaged  some of the photos from my own Redesign/Cover the stains on the Sofa operation and uploaded it to the competition with a hope in my heart to take the big price home :)


AND my prayers where received !!!

I AM the Grand Prize Winner of this contest !!!!!!!!!

and NOT only have I won the big $500 price,the folks  from Comfort Works and IKEAfans have contacted me a week ago to offer me a special BONUS!
They liked mine and Sierra's doodles on the sofa so much ,that they hated the  art to go to waist,thus they offered me to ship the drawn slipcovers to their workshop and make cushion covers of them for me 

"We fell in love with your art on your existing seat covers and Susan from IKEAFANS, thought of a great idea to turn them into new pillow covers. And we agreed!
Of course, the workmanship and additional material will be fully sponsored by Comfort Works, while IKEAFANS has generously offered to cover postage fees (up to $50) for the sending your covers to our workshop.  
We wanted to know what do you think- before we made the announcement. Would this be something you'd be interested in?"

What do I think?.... I THINK IT"S AWESOME!!!!!!!!!!!!!!!!!!!!!!!!


How neat is that^^
I can only say one thing for sure-BEING CREATIVE PAYS UP!!!!!!
And now ,I'll head off to the FABULOUS Comfort Works website to pick up a new fabric for my NEW slipcovers -YEY !!!!

and of course,as soon as I'll get my new sofa covers and cushions ,I promise to show pics and  brag   :D

ALWAYS KEEP CREATIVE PROCESS GOING !


bear_hugs

Monday, May 14, 2012

Making of Peony Bliss Bridal Fascinator

People really have to start  appreciate handmade millinery flowers !!
It takes literally hours upon hours to cut,shape and assemble each bloom !!
Since I worked on a new accessory collection recently and I use only my own handmade flowers in my fascinators ,I want to share the making of ,of my Peony Bliss 
(I didn't capture all the steps ,but you still will be able to see the tedious work involved in making this one precious beauty)

In opposite to making satin or any other synthetic fiber flowers which you can form by heating directly after cutting ,cotton millinery flowers must be starched previously to cutting and heat setting...
So the first step of making cotton bloom would be starching well your fabric 


Step 2 transfer your petal patterns to the previously treated fabric 
To make one peony flower I needed  to draw and cut total of 40 separate petals 


step 3 cut the petals 

 The fabric didn't have enough body the first time I starched ,so I repeated the starching procedure one more time with each petal I previously cut
 This is how I air dried my 40 petals^^

Now each petal's twirls are formed by heat setting the shape with a metal ball shaped tool
 Another way to give the petals a nice nature like shape is by giving them vines. The vines are done by heated fork (right side of the photo shows the veins in the middle of the petal )

after all the petals were formed ,I assembled them into a nice peony cluster  
and Peony Bliss was born

bear_hugs

Shop Update

I designed this collection last spring ,but since I was pregnant with Sheluv  at that time ,I couldn't model it myself,instead I showed it in my shop on my older sister but for some reason ,while showcased on her, the collection didn't take off  (maybe it's because she is to skinny for my shop and it's image in other people eyes...?! )
Anyway, my talented photographer friends helped me to give this entire collection a new life
I think it would be fun to show you the before and after with me wearing my collection in opposite to my big sis :)
Let's the fun begin

BE Unique Top
before

after
BE Unique Top, Asymmetrical one shouldered top

Talk to MY BACK
before

after
Talk to MY BACK

The Wave
before


after

Twist me Hard
before

after

Rose Garden 
before


after


bear_hugs

Sunday, May 13, 2012

Wreath Braid

Thanks to CuteGirlsHairstyles and Pinterest, styling little girls's hairdos become a breeze 
On Pinterest only,there are literally hundreds of  tutorials and inspirations for you to try on your little one
I myself, do it every morning for Sierra my perfect model and loving it !

Braiding is so much fun when you get the hang of it and I actually got a plea from several mothers to start a little braiding workshop here where I live and I strongly considering doing so :)
Here is my take on a Wreath Braide

Wreath Braid photo wreath_braid.gif
bear_hugs

Thursday, May 10, 2012

Pothoshoot -behind the scene

I have this very talented lady friend in her last year of photography major studies that offered me a nice trade-she needed some fashion items to take pictures of for her fashion photoshoot class and I like always, need good photos of my fashion-hence the exchange-my fashion for her photography work :)

The photo shoots started with hair and make up done by yours truly -I had study to be a make up artist years back ,but haven't proceeded with this trade ...
I actually think it's really nice coming back to it from time to time and put make up on ,on someone other them myself ;p
The hair is my new hobby and I enjoy from it daily doing hair for Sierra

So while my friend worked hard  taking GORGEOUS photos of my Victorian Jacket ,I snapped some quick behind the scene action


But of course my  dark photos are just a teaser to the real deal-the amazing  shots taken by Lihi Arad
Give it a round of applause  .......Drams please....................Ta Da.........................


And nowwwwwww ,I'm excited to present  my new Feather Up accessory line
These are only three samples from the many,many  more hair fasinators to come in the near future-
Really hope you'll love the new line

Peony Romance 
Hand cut and formed cotton peony flower and bud with Grey Dun rooster Hair extension feathers and Snow White and Champlain Saddle Hackle feathers all set on a clear plastic side comb 

 Black & White Love Story
Clip On Grizzly  and Grey Dun rooster Feather Hair Extension with Guinea hen feather flower and English Veil bits

 Tropicana 
Goose Feather Flower fasinator
 All the new accessories will be listed in a short while  in the shop
See'ya soon 
bear_hugs