Monday, June 18, 2012

From electriacal spools to AWESOME one of Cake stand

Sierra's birthday is fast approaching and I'm head over with preparations ....
I started early cause I have this annoying tendency to leave everything till the end and then pressuring myself to make all in a VERY short time period...so for ones in my life, I decided to start early and finish all in time .
I plan on a HUGE bash for her 5th B-Day party and the  theme would be Beauty Salon cause this is what best describes my big princess-she is so girly and into beauty and fashion that how could I not to through her a party in this theme :)
I have really big plans for the activities which I hope I'll be able to actually forfill and I already collected a lot of ideas for the desert table too-thanks GOD to Pinterest and the variety in holds :)
and....Since I'm a former cake decorator ,of course there will be a cool girly cake (the design of the cake will remain a secret till after the party -I actually debating a couple of ideas in my head and yet to decide on the one I want to go with ..) BUT  i DEF decided on the cake stand style!
I found a really neat stand from AppleTreeDesign called Dilly Dots while browsing the net -it was made of  ceramic I think ,and was very fun and wimsy  I went through their other stuff and got so inspired that I made up my mind on doing a cake stand of my own .
Making my own pottery is not my cup of tea ,but creating stuff using upcycled materials is so very ME ..... After a quick brain storm I immediately figured I want to use the electriacal spools my hubs brought from work to make my whimsy stand .
The spools are PERFECT for this task as they already as is sort of a cake stands-they have the bottom and upper trays and the middle pole that separates the tires-an awesome candidate  which only needs the proper decoration....and that's where I come into the picture -I'm the perfect men for the decoration job
Check out how the magic happens :)

 one simple electrical cord spool
 drawing the hands (Sierra's hands were the perfect mold)
 giving the hand some red polish mani 
&
adding blings
 dressing the body with a sequin top
 making the 3D hands 


 some more jewelry
 back side got a pink bolero and cute little tutu
coloring the base
 pattern making for the base (leftovers from IKEA 's slide curtains )
 looking damn pretty :)
 adding some more sequins to the side of the bolero
 bottom tire is DONE! Now upper tire makeover 
 base coat for the face
 BIG blue eyes like Sierra's :)
 make up & earrings
 dressing her with strapless sequin tank top
 pompon trim for the hat
 lace trim for the base
 every fashionista MUST have some puff -adding lace appulettes 
Finished!!!! AND Loving it!!!!
 Can be used separately or together


Stay tuned to see how it all looked with the cake and cupcakes on the stand-should be soooo FUN!


bear_hugs

Wednesday, June 13, 2012

Amazing ‪Watermelon art‬‏ - YouTube

O.K I'm one month away from Sierra's 5th Birthday and I'm collecting crazy cool ideas for her Party-this one just stroke me-

‪Watermelon art‬‏ - YouTube
bear_hugs

Sunday, May 27, 2012

Shavuot at the Kinder Garden- Thursday Hairdo

 Sierra had celebrate the Shavuot Holiday in her kinder garden with a Tired Lace dress and Bow Bun hairdo

Bow Bun
Tired Lace and jersey dress+matching headband with vintage flea market finds

Sierra with her friends
They all were so cute wearing their white gowns and flower tiaras in their hair,that I couldn't help myself- little ladies for you :)
bear_hugs

Each Day Different Hairdo-Saturday

Today is the first day of Shavuot Holiday and it happens to by my father in law's Birthday..so of course we have a great reason to dress up fancy ,make our hair pretty and go burn the city :D
Sierra is wearing her couture Emerald Green Tie dress and Waterfall French Braid

Waterfall Braid
bear_hugs

Tuesday, May 22, 2012

Refashion #II -Men's shirt to Women's Peplum Blouse

A few days ago I showed you how you can easily refashion your old shirt and give it a new life...Now I want to show you that not only your old blouses can be restyled ,but you can use your boyfriend's shirts as well!

This time,my task is to make a Peplum Blouse out of men's Oxford shirt
To begin with this project I'll need two XL or XXL if available men's shirt (you'll see why two later)

You'll need  a basic sloper of your size
Put it on your shirt and estimate the right placement you can cut the pattern of -I myself decided to cut it lower then the actual shoulder seams were (see second pic) and to save the reinforcement shoulder piece of the shirt to decorate my new blouse with

Carefully cut off the sleeves ,sides,collar and under the reinforcement to get your "fabric"
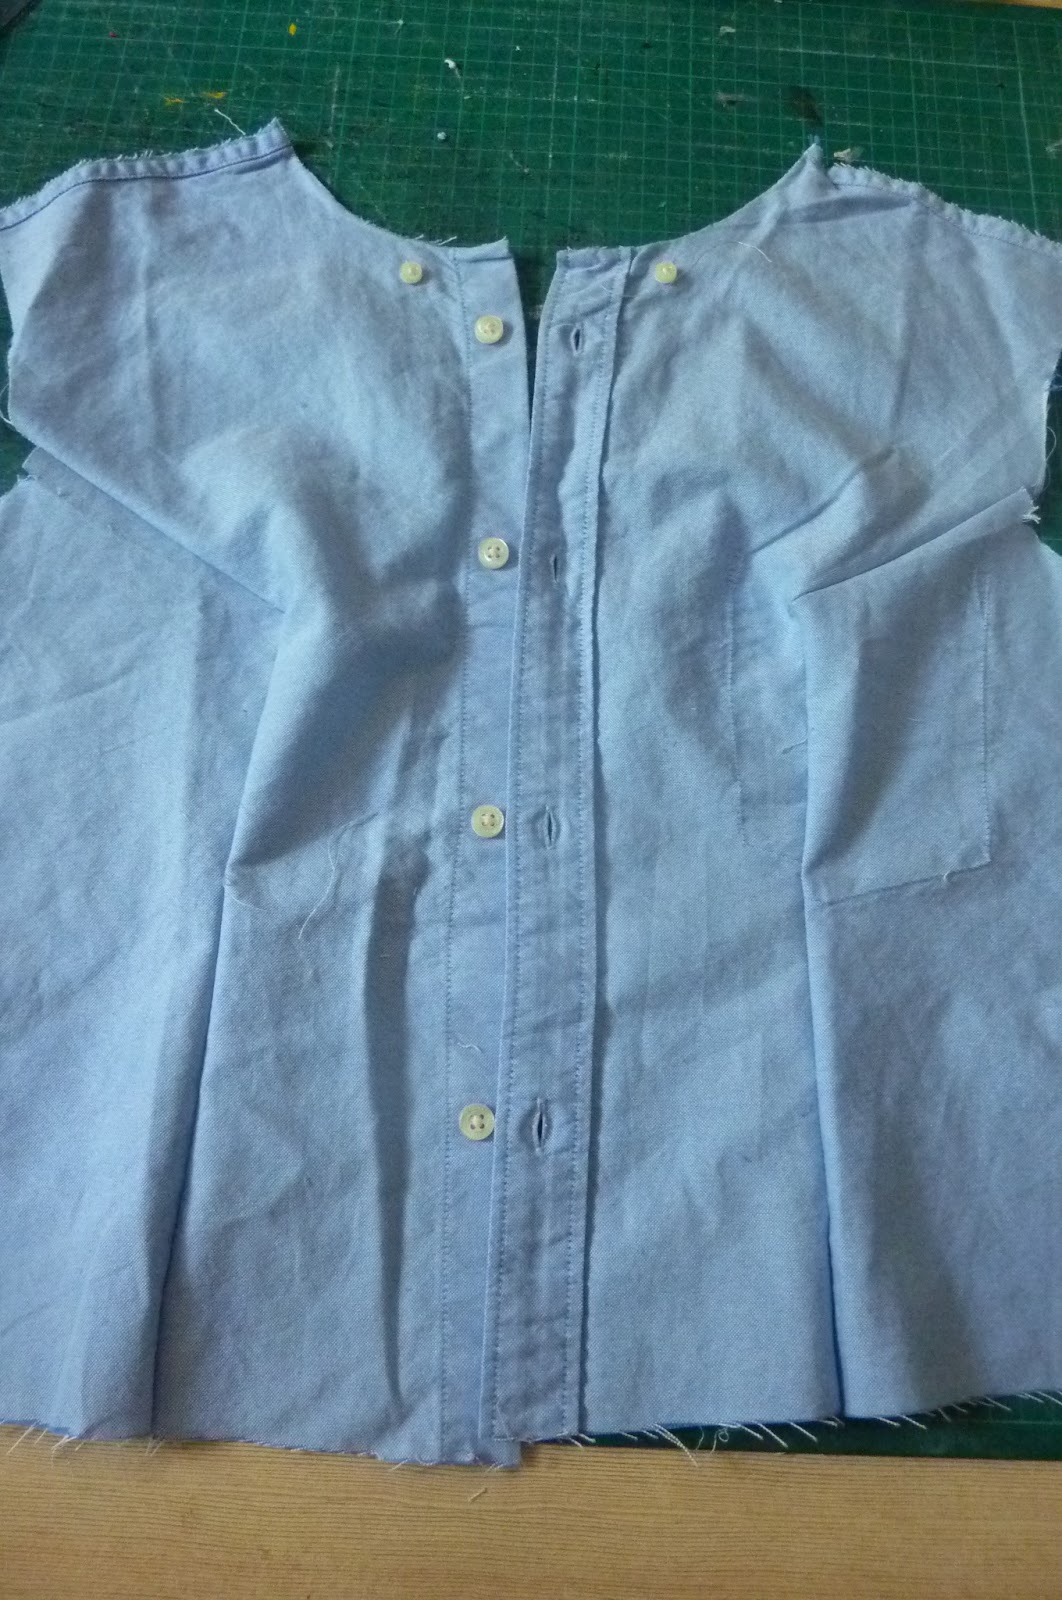
Place your pattern in the center of the placket and cut the front pieces
Mark and sew the darts
Cut the back
Mark and sew the darts
Decide where the right placement of the reinforcement on your new shirt will be
Pin it to place on the back and flip it over so you can match the front pierce
Remember that you haven't sewn the shoulders together so you have 1/2" seam allowance to take into consideration !!!
Fold the allowance in on itself as if you had sew it ,do the same to the front pieces
Put both shoulder parts close together and cut the excess of the reinforcement piece to match the cut edges of the new pattern

Sew the reinforcement piece to it's place
Cut the peplum piece of the second men's shirt you have-1 XL shirt's back was enough to cut a seamless full peplum for a size L women's shirt!
Treat the edges with bias tape or make narrow double rolled hem all around but the waist
Sew the peplum to the shirt
Now sew the collar back to the neckline
I had a small hick up at that area-my original pattern's neckline was wider then the standard men's collar ,so I had to improvise ...I used the collar from the second shirt I previously cut for the peplum,and pieced both collars together to complete the 10cm gap I had in my original to short collar (you can barely see the seams on the back ,yet the impro had actually created a very cool doubled new collar )
Cover the raw seams with bias tape for a neat finish

Here I forgot to take pictures of the process,but to make the new sleeves you just follow the same steps as with the bodice stages aka cutting the original sleeve open...removing the cuffs...placing your blouse's sleeve pattern on top and cutting the new sleeves (you may experience some difficulties  with the sleeve's placket but with some jiggling I sure you'll manage )
When your sleeve is sewn together,sew the cuff back on.
NOTE- the cuff of men's shirt will be bigger then women's sloper but,I decided to leave it as is and let it overlap for an additional interest-you just need to replace the original button farther then it was or leave it as is for a more roomy style
Et Vu a La  AWESOME  new oxford Peplum Blouse
bear_hugs

Friday, May 18, 2012

Operation Upcycle MY SOFA

Remember,I already told you earlier in one of my posts about my white IKEA sofa and how it is TOTALLY wrong to buy white couches when you have kids <----click here for the post 
Well, one lovely April morning ,I saw this "Operation Upcycle MY SOFA" contest post on a timeline of one of my FB friends and immediately decided to join in, as I have (hopefully,not for long) the most STAINED IKEA sofa EVER .

The rules were simple (see beyond) 
So I collaged  some of the photos from my own Redesign/Cover the stains on the Sofa operation and uploaded it to the competition with a hope in my heart to take the big price home :)


AND my prayers where received !!!

I AM the Grand Prize Winner of this contest !!!!!!!!!

and NOT only have I won the big $500 price,the folks  from Comfort Works and IKEAfans have contacted me a week ago to offer me a special BONUS!
They liked mine and Sierra's doodles on the sofa so much ,that they hated the  art to go to waist,thus they offered me to ship the drawn slipcovers to their workshop and make cushion covers of them for me 

"We fell in love with your art on your existing seat covers and Susan from IKEAFANS, thought of a great idea to turn them into new pillow covers. And we agreed!
Of course, the workmanship and additional material will be fully sponsored by Comfort Works, while IKEAFANS has generously offered to cover postage fees (up to $50) for the sending your covers to our workshop.  
We wanted to know what do you think- before we made the announcement. Would this be something you'd be interested in?"

What do I think?.... I THINK IT"S AWESOME!!!!!!!!!!!!!!!!!!!!!!!!


How neat is that^^
I can only say one thing for sure-BEING CREATIVE PAYS UP!!!!!!
And now ,I'll head off to the FABULOUS Comfort Works website to pick up a new fabric for my NEW slipcovers -YEY !!!!

and of course,as soon as I'll get my new sofa covers and cushions ,I promise to show pics and  brag   :D

ALWAYS KEEP CREATIVE PROCESS GOING !


bear_hugs