Thursday, November 28, 2013

Friends Giving -30 days of Holiday Projects project #3

Today I have a very fun little project for you-
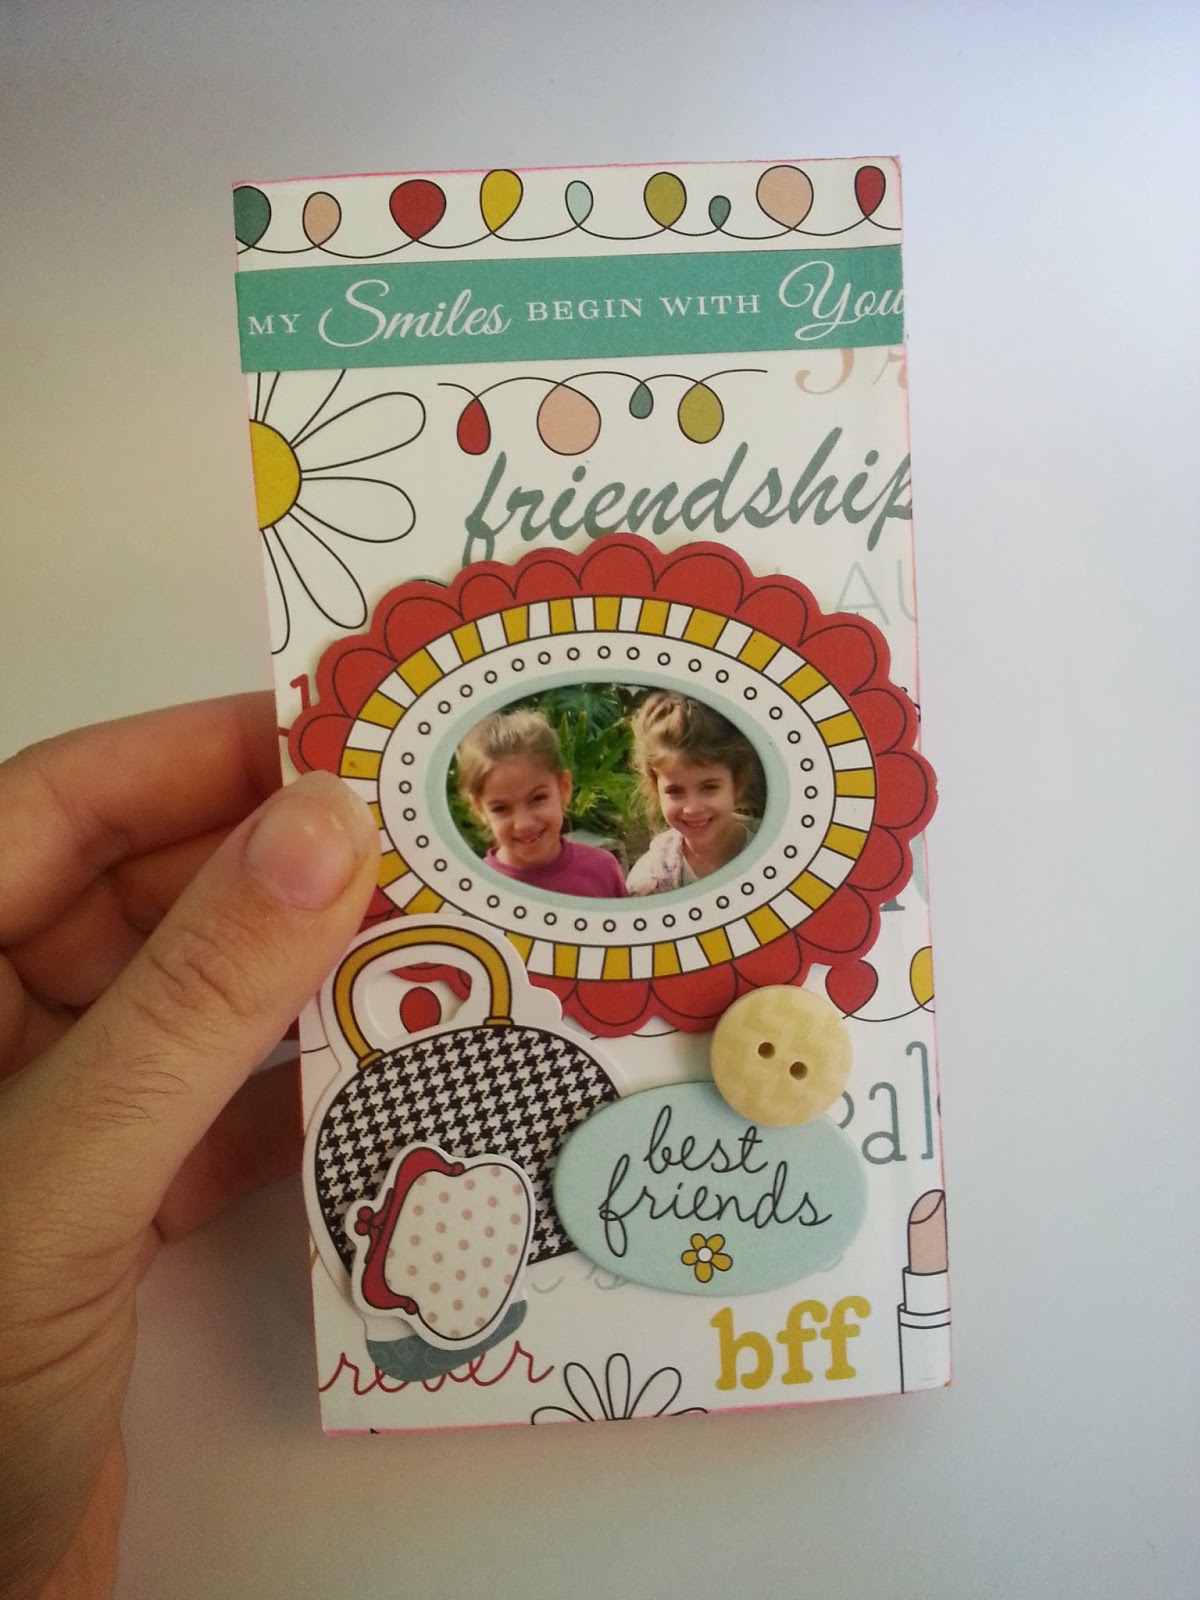
I want to show you how you can easily fold a single sheet cardstock to make a 6 page mini album which  can work for any occasion really-decorate it with holiday theme cardstock or use a holiday driven colour scheme ,and you'll have a great gift for the gift giving season

Friends Giving photo Friends-Giving_zps35a31b3a.gif

To make your album ,you'll need
1 12X12" cardstock- it can be any cardstock really,since the base of the album will be completely covered.


Fold your paper in half
Unfold turn and fold the other side in half

Now fold the two half sections inwards to make a total of 8 small rectangulars

Unfold the paper and mark the two middle rectangulars shown
Make a straight cut ONLY through these two middle rectangulars (from valley fold to valley fold)

The covers of your album will be the two top right rectangulars
NOTE that when you decorate those two you need to glue your decorations upside down 
Use your XYRON glue stick to apply glue to these two rectangulars
Choose your cardstock according to the theme you want to go with-I used cardstock from Imaginisce 'Love you more' collection to make a "Friends Giving" album
We don't have "Thanksgiving" here in Israel,but we do Give Thanks everyday for the friends God has blessed us with,so I thought it will be my take on Thanksgiving :)

Cut two 3"X 6.5" covers 
I used Imaginisce 'Chic Chat'  and 'Shop till you Drop' cardstocks for my covers (such a girly and appropriate names for my album  :D )
Glue them in place ( remember to do so upside down! )


Now fold your mini album like shown (fold in half and then push the two ends toward each other ) 


After understanding how the whole folding thing works, open your cardstock flat again and run it through your Creatopia machine loaded with permanent adhesive cartridge

If you have glue residue on your covers,grab your Xyron adhesive eraser   and work it's magic

Refold as we did above (no place for mistakes here -remember we've just applied glue on...)

Now it's time to decorate 
XYRON 3" sticker maker is a perfect tool for mini album decorations since our album pages are just slightly smaller than 3" wide
I took the "Best Friends" chipboard sticker from Imaginisce "Note -orious" set , removed the middle section of the sticker and inserted a photo of my princess ,Sierra and her besty in.
Then I run the shape through the 3" sticker maker to apply glue on the photo part of my newly improved sticker


Glue the sticker on  the cover  and keep decorating till you happy with the result
Keep up the good work you do with the rest of the album pages
TIP -If you have an ugly date imprint on your photo, just cover it with some washi tape or transparent stickers
I

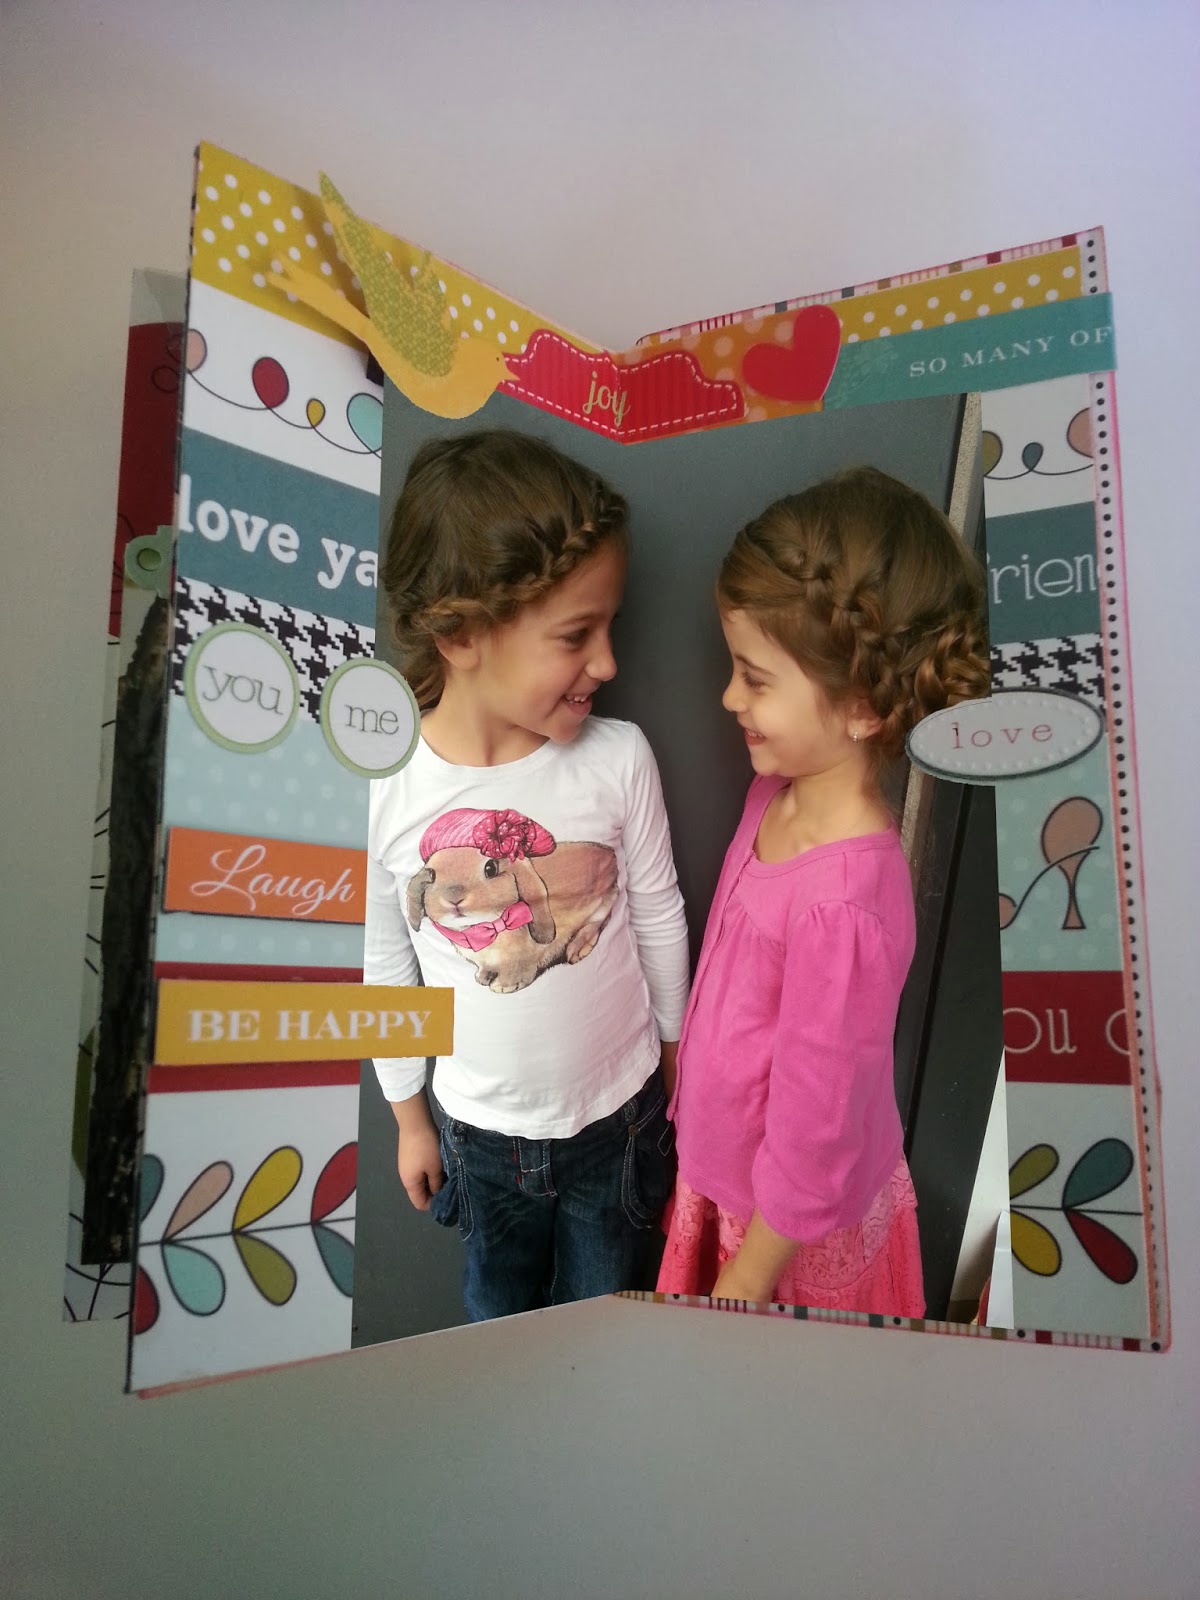
Move on to the next pages and work your magic


1st spread
They are so adorable together,ha :)

2nd spread
 3d spread

Enjoy creating and to all my lovely readers who do celebrate Thanksgiving, I wish you all Happy Holiday and Thanks for reading !!!

bear_hugs

Thursday, November 21, 2013

Fabulous Fashionistas

Spent a whole hour of my busy day watching this short film and EVERY second of it was a PURE INSPIRATION!!!!
bear_hugs

Tuesday, November 19, 2013

30 days of Holiday Projects- II

Holidays are upon us and with them the gift buying ( I prefer gift making of course )  ...Gift Wrapping....and Gift Giving  :p
I thought it would be a good idea to post a quick 'how to decorate a simple origami box to make it a show stopper /conversational piece' in just a few easy  peasy steps
Here is the way I do it-
You'll need
2 12X12" Coredinations cardstocks in the colour of your choice -1 for the box and 1 for the rose
1 pc 4.25X5.5" Coredinations Glitter Silk cardstock GX-1700-22  for the decorative petals
4 3/8" (10mm) XYRON Adhesive Dots
Follow the instructions on  How to Decorate a Simple Origami Box  on Snapguide.

 FYI Many Origami Rose tutorials are available on You Tube,I found this tut to be the most easy to follow through
bear_hugs

Tuesday, November 12, 2013

8 Design Projects in less than a minute each

Great demonstration of modern sustainable design that can be so simple yet so genius 


bear_hugs

Happy Holidays Merry Everything - 3D Paper Frame DIY


Xyron is having a 30 Days of Holiday Projects event -how fun is t that, ha
To dive into the holiday spirit,my first project would be a DIY of paper frame with holiday wishes 
This is a VERY easy project you can do with your kids ,so let the fun begin


To make a 3D paper frame like this, you'll need

To start with ,you need to measure the artwork you'll be putting in the frame-mine is a 6X6" Luxury Centura Pearl 6" x 6" Printable Snow White Cardstock by Crafters Companion.
  Find the center of your 12X12 cardstock *mark and score the shape of your postcard inside 
Mine is a 6x6" so I marked the square 3" to each side from the middle point.

Now I have 3 inches left on each side which we need to divide  to 5 sections  
My calculations gave me the measurements as follow (true only if you use a 6X6 artwork with this specific 'Happy Holiday Joy cardstock!!!
 I calculated all the numbers to perfectly hit the writing on the decorated paper
. ) -

  1. First score should be 0.5" from the edge of the paper. Score all four sides!
  2. Second score line would be o.5" as well
  3. Third score measures 2cm
  4. Forth score 0.5" 
  5. last score line is 2cm as well

Fold all the lines (all mountain folds)

 Now we need to mark the cutting lines-
Begin with the edges, mark a 45 ° line tilted to the left. The top point being on the postcard's measurements scoreline  .
Second cut line will be on the scoreline itself
Third line will be tilted to the right and be another 45 ° stroke
Fourth line will be a straight vertical line
And the last line will be a parallel to the edges stroke

 Do a mirrored cut on the other side
 And repeat the same steps to the top of the cardstock as well
 Fold all the scorelines
 Insert the straight edges into the diagonal ones.
Do so to all sides to create the frame
 Use a dab of Teresa Collins Clear Hold glue  to permanently set the frame
 Cute little thing ,right :) The inside of the frame is as nice as the frame itself

 If you want to add some additional decoration,use your Xyron sticker maker-I used my 3" machine to add all over glue to some sweet little vellum snow flakes
 Thought a nice glittered star will add some extra glam-this one is from American crafts
PEPPERMINT EXPRESS REMARKS DIMENSIONAL ADHESIVE STARS 2"


When your frame is ready,use your 9" Creative Station to glue in your postcard or artwork and you're done

I LOVE my little letterpressed card.
I hand pulled it  using my XYRON Creatopia Machine loaded with the XYRON die press (this is a discontinued product,so grab it while it last )
I left the word "MERRY"  as a white on white  Blind Debossing and added white chipboard letters by Heidy Swapp to keep the nice crisp look but with that extra little additional embossed texture
 All has left is to wish you all a HAPPY Holidays and Merry EVERYTHING!


bear_hugs

Saturday, November 9, 2013

Altered Clipboard DIY- Heidi Swapp Blog Hop

Hey,Hey -have you missed me ? :D
 It's been a while since my last DIY tutorial  ha...
Today I'm going to show you how to make an Altered Clipboard from SCRATCH!
Yep,it can be done with a few simple materials (and some tools from your husband's toolbox  )
So...this is what we are going to do today

Here are the ingredients needed
  1. Hard cover from an old book
  2. Decorative cardstock
  3. Various decorations
  4. XYRON Creatopia Machine loaded with permanent adhesive cartridge
    or
  5.  XYRON glue stick
  6.  XYRON 5" Creative Station
  7. XYRON 3" Sticker Maker
  8. XYRON Mega Runner
  9. Teresa Collins 2 Hole Chipboard Punch
  10. Small piece of sanding paper
  11. A piece of beeswax 
  12. Iron
  13. Drill+ drill bit 
  14. Rivet Gun 
  15. Metal clip
Lets begin-
Take your old book and cut of one of it's covers .
 I used an old dated dictionary 

 Sand the cover to reduce the shine and give it some teeth
 Find a word  or cool sentence from  the old book - we are going to frame it later on :)
I used the description of the word "Create"

 I also did a sketch of a cute smiling bear (since my shops named Pettibear  & PettiBearKIDS and my logo is a bear ,I thought it would look really nice without looking to logoie )
If you don't draw/ sketch, you can always use a stamped image .

 To make my large scale sketch less overpowering, I decided to make it sheer by melting a small piece of beeswax between two layers of parchment paper and when melted I insert my image between the papers and iron over it making sure the melted wax is spreading evenly across the image

 See how sheer it became
 Now we are going to treat our clipped dictionary scrap of paper by giving it a nice frame
 I use my XYRON  Mega runner to apply glue on the narrow edges of the frame and glue the frame on top of my dictionary page.
After glueing ,trim the extra paper around the edges.

This sweet embossed frame came from a set of lovely frames by Heidy Swapp.
The set calls "color magic pressed paper frames"


 This is the time to assemble the composition
Run the decorative cardstock through your Creatopia Machine or apply an even coat with your XYRON Glue Stick
 I used tiny Polka Dot single sided patterned paper from Heidy Swapp collection for the background
And a 'checked by Santa 'checklist paper from the same "Believe" paper pad 
I cut the checklist paper to a narrow strip ,run it trough my 5" Creative Station and glued it on top of the background


Glued in my waxed bear sketch on top

Added my framed ephemera in

 Decorated my composition with "you are here" chipboard stickers from Lily Bee Design Destination line

 Added a  "Beautiful" wood tag from 'LOVE'  Wood Tag  collection by LYB
 And glued in one of the cute library cards from Maya Road Design ,using my XYRON  3" Sticker Maker


 I felt like some wording is in order,so I used Heidy Swapp's ‘color magic’ chipboard striped alphabet stickers for the 'ART'
American Crafts Good Tidings thickers chipboard alphabet stickers for the 'DIY'
And  'craft' word assembled with Lily Bee Design Destination Letter Stickers which were glued on top of Maya Road's  oval tag shape from Mixed Shapes Mini Chipboard Set
 The only thing left is to attach the large clip.
To do so,I needed to drill two holes in the clip itself ,but before the drilling I needed two good symmetrical marks-
 I found the best tool to make the template in  Teresa Collins NEW  2 hole punch.
By punching a piece of scrap paper I instantly had a ready to mark stencil

 Making my marks through the holes of my template

 And with my hubby's trusty Makita two holes were done ( begin the hole drilling slowly as the drill bit may slip easily from the tilted sleek  clip's surface  ,so be careful not to get hurt ! )
 I also drilled two holes through my altered board
 Attaching my large clip to the board with some paper clips

 And with  the help of my rivet gun (or whatever it's called) permanently connecting the large clip to my altered board

 The back of my board
And my awesome Altered Clipboard is DONE :)


bear_hugs