Showing posts with label Creatopia machine. Show all posts

Tuesday, October 1, 2013

Coredinations Blog Hop Extravaganza

Only one week has pass since our last blog hop,and here we go again :)
XYRON has teamed up with one of my favourite cardstock companies-Coredinations for another fun hop- YEY

After having some thought on the project I want to make this time,and knowing how great core cardstock is both quality and diversity wise, I knew what I wanted to do- I'll be making a
 Coptic stitch Sketch book/ Photo Album using color core cardstock for the signatures of the book .
 photo 20131001_082600-2_zps4b30b3c5.gif
To make a coptic stitched book you'll need-
  • 16 sheets of Coredinations color-core cardstock - signature series light and dark each folded in half and divided into groups of 4
  • Chipboard or Cereal box cut to size of single segment 
  • 3 Patterned card stocks - 2 for the cover and one for the cover lining
  • XYRON Creatopia Machine w/ perm. adhesive cartridge
  • XYRON glue stick for corners
  • Drill
  • Waxed Thread at least 10 times larger than the length of your book
  • Needle

*I'm going to show you how I made and decorated the cover of my Album/Sketchbook only.
If you'd like to learn how to bind your book,there are many  FABULOUS tutorials by Sea Lemon here

Let's starts
First of, gather your supplies...
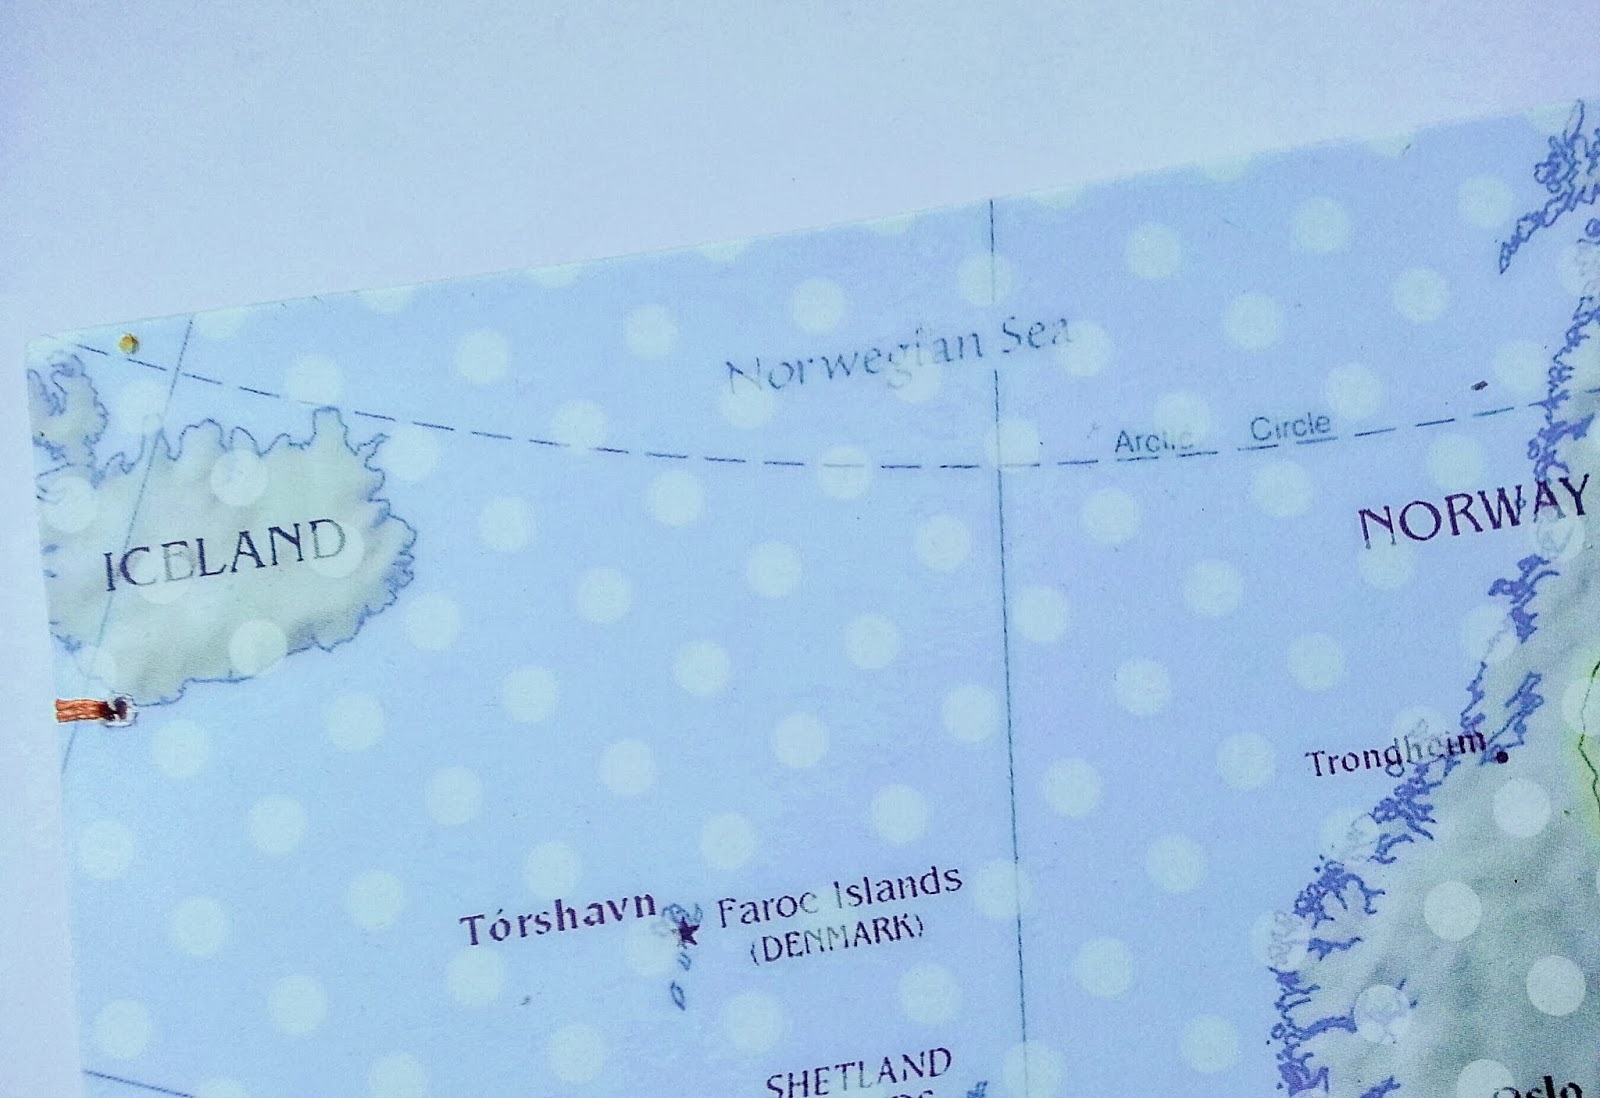
For the cover of my book,I'm going to use Lily bee design Destination line  patterned cardstock which was soooo PERFECT for me as the line carries a sheet named  "Destination Landmark" (Landmark-DSP326 ) that has  Europe's map  printed on it, and since we just came back from a family trip to France ,this paper made an awesome front cover for my book
For the back cover I used the 80 Days-DSP321 paper
And Atlas-DSP323 for the lining 

I recycled a Cereal Box for the base of the  hard covers

As I said above, I used the wonderful color core cardstock to make the signatures of the book-
it has a great weight to it if you plan on sketching /drawing /illustrate on it AND you can emboss and sand it as well to reveal the hidden core and give more interest to your page  (like I did in my previous DIY posts here, here and here

To make the hard cover, run the chipboard through your Creatopia Machine

 Put the board glue side down directly on your decorative sheet -leave enough margins all around  the board as we want to wrap the patterned paper on top of the chipboard
After covering both the boards we need to treat the reverse side

 Take your 3rd sheet of patterned cardstock,divide it in half ,run each half through your Creatopia Machine and glue it in place to cover the cereal board print


Now follow the instruction of this great video tutorial by Sea Lemon to bind your book/album


After  you have  stitched your book together it's time to decorate it
Since I decided to use the full sheet without trimming it first,I have the logo of Lily bee Design left on the bottom of the cover ;p
 It's nice and all,but I don't want it on my design,so it's time to cover it
I used Destination Circle & Tag Stickers - DSS34 to cover the logo itself,but actually decided to leave the name of the stock in place as it fits great for the theme I'm going with
On the upper part of the cover where the dotted lines of the map are,I glued some colorful chipboard banners ( Destination Chipboard Stickers-DSC333 )

It's like it meant to be there :D
 To emphasize our visited destination , I framed "France"  on the map, added the date of our flight, a little chipboard plain and some dotted lines connecting the plain to the "Our Adventures" tag


In France,we first came to Paris and then continued our trip to Normandy,so I thought it would be fun to mark our visited locations on the map with a stick pin (this cutie is from Naturals collection by Little Yellow Bicycle  NA-SP50 Wood Words

For the inside of my book, on the stock itself, I decided to leave the logo and wording Coredinations had print  on and not trim it for two reasons-
1. it's nice to see the color of the core,so if you plan to use this book as a Sketchbook  or Art Journal,you'll know what you'll get if you  sand or tear the paper . And you can always cover the logo with tags/ washi paper etc.

2. Since I'm going to use this book as a photo album, and we had visit LOTS of places and different cities in France, I  will use these little extras as a dividers (of course I'll need to cut the dividers tabs first)  and  arrange my photos in a chronological order of each visited city

*TIP- when you first arrange the signatures ,use cardstock with the same colour scheme .
This way you'll create a fun and colorful book with a cohesive  and coordinating look
Coredinations cardstock will make your life very easy with this ^^  task as their stock has a very pleasant color pallet with nice light to dark colour scheme

Another advantage of  using Coredinations Color Core cardstock  when binding your own books is the stock's weight-it's sturdy enough and won't tear easily not when you drill the holes for the binding  nor when you tighten the thread while you stitch it together
And the canvas texture of the pages will give you a great painting base too :)

The possibilities are endless!

Enjoy Creating !


bear_hugs

Monday, May 27, 2013

Art Frame DIY part II

In the last post,I showed you how to make your own awesome Art Frame without any wood,nails or  other heavy duty tools. This post is a follow up :)
Another frame,same materials with slightly different result
Second option with Canvas Flowers Stickers-you decide what you like best :)

You'll need-
A postcard 
Foam Board
Sandpaper
Soft Pastels 
Fixative
Posca Markers
Strong Glue 

You start the same-tracing your postcard  around it's perimeter and then adding 1 to 1.5" all around to create the frame.
Cut out the middle and set the frame aside 
 Now we shall prepare the decorative coating of the frame
Set your Creatopia Machine with the embosser roller-I use DOTS pattern for this project
 Emboss the Cardstock 
 Very,Very cool ,ye
 Now sand the Core'dinations ColorCore Cardstock  to reveal the core


 Now run the embossed /sanded paper through Creatopia again ,but this time with the permanent adhesive cartridge inside
 Glue the patterned paper on top of the already cut foam board frame 
 Fold the margins onto the foam board as if you are wrapping a gift :)
 Cut diagonal triangles inside 
 Fold them on top  to cover the ugly sides of the foam  

Cut the extra triangles and use them to glue the postcard inside the frame
 The frame is ready for decorations 
 Draw extensions to the flowers in the postcard-use same colours  and media if possible
 Add steams with ultra fine marker-I use PC-1MR Posca marker
 To add some additional  3D effect ,I use Little Yellow Bicycles -Naturals Stick Pins  -Wood Words
They are too precious to pass on
 Just pushing them inside the foam board (not something you would do easily if you were to use a wooden frame)
 Admiring the results :)

GORGEOUS Art Postcard by Anne Julie Aubry  " Girl at Poppies" 
bear_hugs

Monday, May 20, 2013

Art Frame DIY

You all know that I LOVE collecting Art Postcards from my favorite worldwide illustrators !
Some I buy...some I win in various blog giveaways and some I receive from my artists friends :)
  
I surely posted quite a lot of Art Frame projects where I showed you my own contribution to the beautiful art postcards and prints  I've collected through the years and this post is one of them yet again, but this time it's a DIY tutorial as well -YEY
To make your own Art Frame like this lovely shown here
Art Postcard by Minasmoke 
 you'll need-
A postcard 
Foam Board
Core'dinations ColorCore Cardstock
Sandpaper
Soft Pastels 
Fixative
Posca Markers
Gel-a-Tins Stamps
Strong Glue 

To begin with replace the cartridge in your Creatopia Machine with an Embossing rollers in the pattern of your choice -I choose the Hearts pattern for this project because the flowers in the postcard have a heart shape to them :)
Now run your cardstock through Creatopia 
 AWESOME  already and I haven't done anything special yet ;)

Now take your sandpaper and rub it on the Core'dinations ColorCore Cardstock to reveal the core 

 See how the core is now revealed-really cool feature of these speciality cardstocks

O.K, after finishing the cardstock treatment,we are ready to cut the frame out of the foam board
Just place your postcard on the board, trace it and cut the desired height and width  of the frame

I cut the foam board with my roller knife-I don't mind if the edges won't come out straight and neat as we are going to glue our heart embossed cardstock on top anyway

Now you need to change back from the embosser rollers to your adhesive cartridge and run the cardstock through Creatopia
Place the cardstock  glue side up and the foam board on top
Fold the excess cardstock inwards onto the frame
Do it for all the sides
Now we have a ready frame with glue in the middle to put our postcard in

I also cut 4 narrow strips from the same cardstock and glued them inside to cover the sides of the foam board
And now the artistic part of the Art Frame begins :)
Grab your pastels and start colour  the embossed hearts to create flowers replicas 

When you finish drawing flowers ,add some shading like in the original postcard and some hand drawn  lineart poppies 
And if you have some stamps you think will  work great with the theme of the postcard,don't be afraid to use them as well :)
I have the sweetest Honey Bear set by Gel-a-Tins  which worked fabulous with my art frame-
I used the Butterfly,Bees and Daisies seen on the bottom right corner to compliment my hand drawn flowers

To finish the frame,you'll need a thingy to hang the frame from on the wall
I used the opening tab from a Soft Drink can as my hanger device ;D 
Glued it in place and TA DA
(How awesome is the back of the frame haaa )

 You have a ready to  hang frame  

On the wall with it's friends:)


bear_hugs