Monday, May 14, 2012

Making of Peony Bliss Bridal Fascinator

People really have to start  appreciate handmade millinery flowers !!
It takes literally hours upon hours to cut,shape and assemble each bloom !!
Since I worked on a new accessory collection recently and I use only my own handmade flowers in my fascinators ,I want to share the making of ,of my Peony Bliss 
(I didn't capture all the steps ,but you still will be able to see the tedious work involved in making this one precious beauty)

In opposite to making satin or any other synthetic fiber flowers which you can form by heating directly after cutting ,cotton millinery flowers must be starched previously to cutting and heat setting...
So the first step of making cotton bloom would be starching well your fabric 


Step 2 transfer your petal patterns to the previously treated fabric 
To make one peony flower I needed  to draw and cut total of 40 separate petals 


step 3 cut the petals 

 The fabric didn't have enough body the first time I starched ,so I repeated the starching procedure one more time with each petal I previously cut
 This is how I air dried my 40 petals^^

Now each petal's twirls are formed by heat setting the shape with a metal ball shaped tool
 Another way to give the petals a nice nature like shape is by giving them vines. The vines are done by heated fork (right side of the photo shows the veins in the middle of the petal )

after all the petals were formed ,I assembled them into a nice peony cluster  
and Peony Bliss was born

bear_hugs

Shop Update

I designed this collection last spring ,but since I was pregnant with Sheluv  at that time ,I couldn't model it myself,instead I showed it in my shop on my older sister but for some reason ,while showcased on her, the collection didn't take off  (maybe it's because she is to skinny for my shop and it's image in other people eyes...?! )
Anyway, my talented photographer friends helped me to give this entire collection a new life
I think it would be fun to show you the before and after with me wearing my collection in opposite to my big sis :)
Let's the fun begin

BE Unique Top
before

after
BE Unique Top, Asymmetrical one shouldered top

Talk to MY BACK
before

after
Talk to MY BACK

The Wave
before


after

Twist me Hard
before

after

Rose Garden 
before


after


bear_hugs

Sunday, May 13, 2012

Wreath Braid

Thanks to CuteGirlsHairstyles and Pinterest, styling little girls's hairdos become a breeze 
On Pinterest only,there are literally hundreds of  tutorials and inspirations for you to try on your little one
I myself, do it every morning for Sierra my perfect model and loving it !

Braiding is so much fun when you get the hang of it and I actually got a plea from several mothers to start a little braiding workshop here where I live and I strongly considering doing so :)
Here is my take on a Wreath Braide

Wreath Braid photo wreath_braid.gif
bear_hugs

Thursday, May 10, 2012

Pothoshoot -behind the scene

I have this very talented lady friend in her last year of photography major studies that offered me a nice trade-she needed some fashion items to take pictures of for her fashion photoshoot class and I like always, need good photos of my fashion-hence the exchange-my fashion for her photography work :)

The photo shoots started with hair and make up done by yours truly -I had study to be a make up artist years back ,but haven't proceeded with this trade ...
I actually think it's really nice coming back to it from time to time and put make up on ,on someone other them myself ;p
The hair is my new hobby and I enjoy from it daily doing hair for Sierra

So while my friend worked hard  taking GORGEOUS photos of my Victorian Jacket ,I snapped some quick behind the scene action


But of course my  dark photos are just a teaser to the real deal-the amazing  shots taken by Lihi Arad
Give it a round of applause  .......Drams please....................Ta Da.........................


And nowwwwwww ,I'm excited to present  my new Feather Up accessory line
These are only three samples from the many,many  more hair fasinators to come in the near future-
Really hope you'll love the new line

Peony Romance 
Hand cut and formed cotton peony flower and bud with Grey Dun rooster Hair extension feathers and Snow White and Champlain Saddle Hackle feathers all set on a clear plastic side comb 

 Black & White Love Story
Clip On Grizzly  and Grey Dun rooster Feather Hair Extension with Guinea hen feather flower and English Veil bits

 Tropicana 
Goose Feather Flower fasinator
 All the new accessories will be listed in a short while  in the shop
See'ya soon 
bear_hugs

Wednesday, May 9, 2012

Re-Fashion Re-Create Re-Design

I have had a couple of neat projects on my hands these past few weeks,one of them is refashioning a second hand women's plaid button up shirt and give it a more fashion forward new life .
I thought of it and decided to share the making of process with you (pardon for the bad quality photos ->
I usually work at nights -that is the only quite time I have to work without a destruction from my little ones,so all the photos were taken then,thus no light and lots of pixels ...But,you'll forgive me right ;)

 So lets begin ...
We'll make a sweetheart lace neckline  with cut out laced shoulders and back and introduce  fullness to the hips by inserting a rounded lace godets

You'll need one shirt old or new that fits you well at bust and waist and nice quality lace -I got mine in Tel Aviv for an outrageous $45 per meter,though it's stunning and made of 100% cotton fiber which is a huge plus for me as synthetic fibers are not working that well in hot weather and it always nice to have a natural fiber close to your skin
 Start by marking the true waist line of the shirt (it usually will be located around 43-45 cm downwards  measured from the highest point of neckline)
Right under,it's where the godets will be placed-though you can make them higher and locate them at under-bust
 Mark the center of the shirt -will be located on the button placket

 Draw a sweetheart shape neckline on a craft paper and trace it to the shirt with a removable marker
 Determent the width of the cut out godet (NOTE-the inserted lace godet have to be MUCH larger then the cut out piece to make the hip area full !!!)  
 Mark the placement of the godets and cut
 I find it easier to cut one side then fold and cut the other side
 Do the cutting of the side and back godets 
 This is how your shirt will look like after all the godets were cut
 Now cut the sweetheart neckline
Use the cut out as a template for the lace pieces-make sure to cut 1 cm larger all around for seam allowance  
Lace parts are ready 
Now make the cut ends of the shirt pretty -I used bias tape 
Sew the lace parts together
Attach the lace where the plaid was 
Hem the godets  with bias tape or whatever method you find easier  
Sew the lace inserts in place-see how the lace 
godets are much wider then the original cut out was^^

and now... find the difference between the upper^ and bottom photo
*hint-it's all about the hem

Trim the godets  to a nice circular shape and hem
That's it.......
You've got yourself a brand new stylish button up with lace inserts shirt!

bear_hugs

In my Garden

So I have a small garden in my new home and I love to play around and grow things from scratch -but NOT from store bought seeds (God forbid :D )...Instead I try and error  what can be grown from the fruit and veggie itself
I've already planted a celery from it's cut end-works like a charm!!!
A cherry tomatoes from their seeds -we already have petite tomatoes on it
and...I tried planting cabbage from it's cut core!

AND IT WORKS!!!
Here is a quick how to -


TA DA!!!!!!!!!!!!!!!!!!
bear_hugs

Thursday, April 19, 2012

White Sofa...Is it really a good idea

Two years ago we bought an IKEA couch with WHITE slipcovers-WHAT A HUGE MISTAKE!!!
Of course we knew the mistake we are making right at that time,but it was on sale ...and I knew that I can always dye the slipcovers to a different color if I'd choose to...
A week after we got the sofa,Sierra (my 4.5 yr. old ) drew some outrageous blue doodles on the shazlong with a non removable marker (of course...could that possibly be drawn with any other marker-only the non removable type :D )
And Yes,I did flipped -who want to see a HUGE blue doodle on a new WHITE couch ....But hey,somewhere deep inside we knew it's gonna happen,so we let it pass and added to the doodles like about thousand of other stains ...And so,after seeing  the cutest doodle chair on Pinterest  I decided to go for it and doodle away on my sofa too.
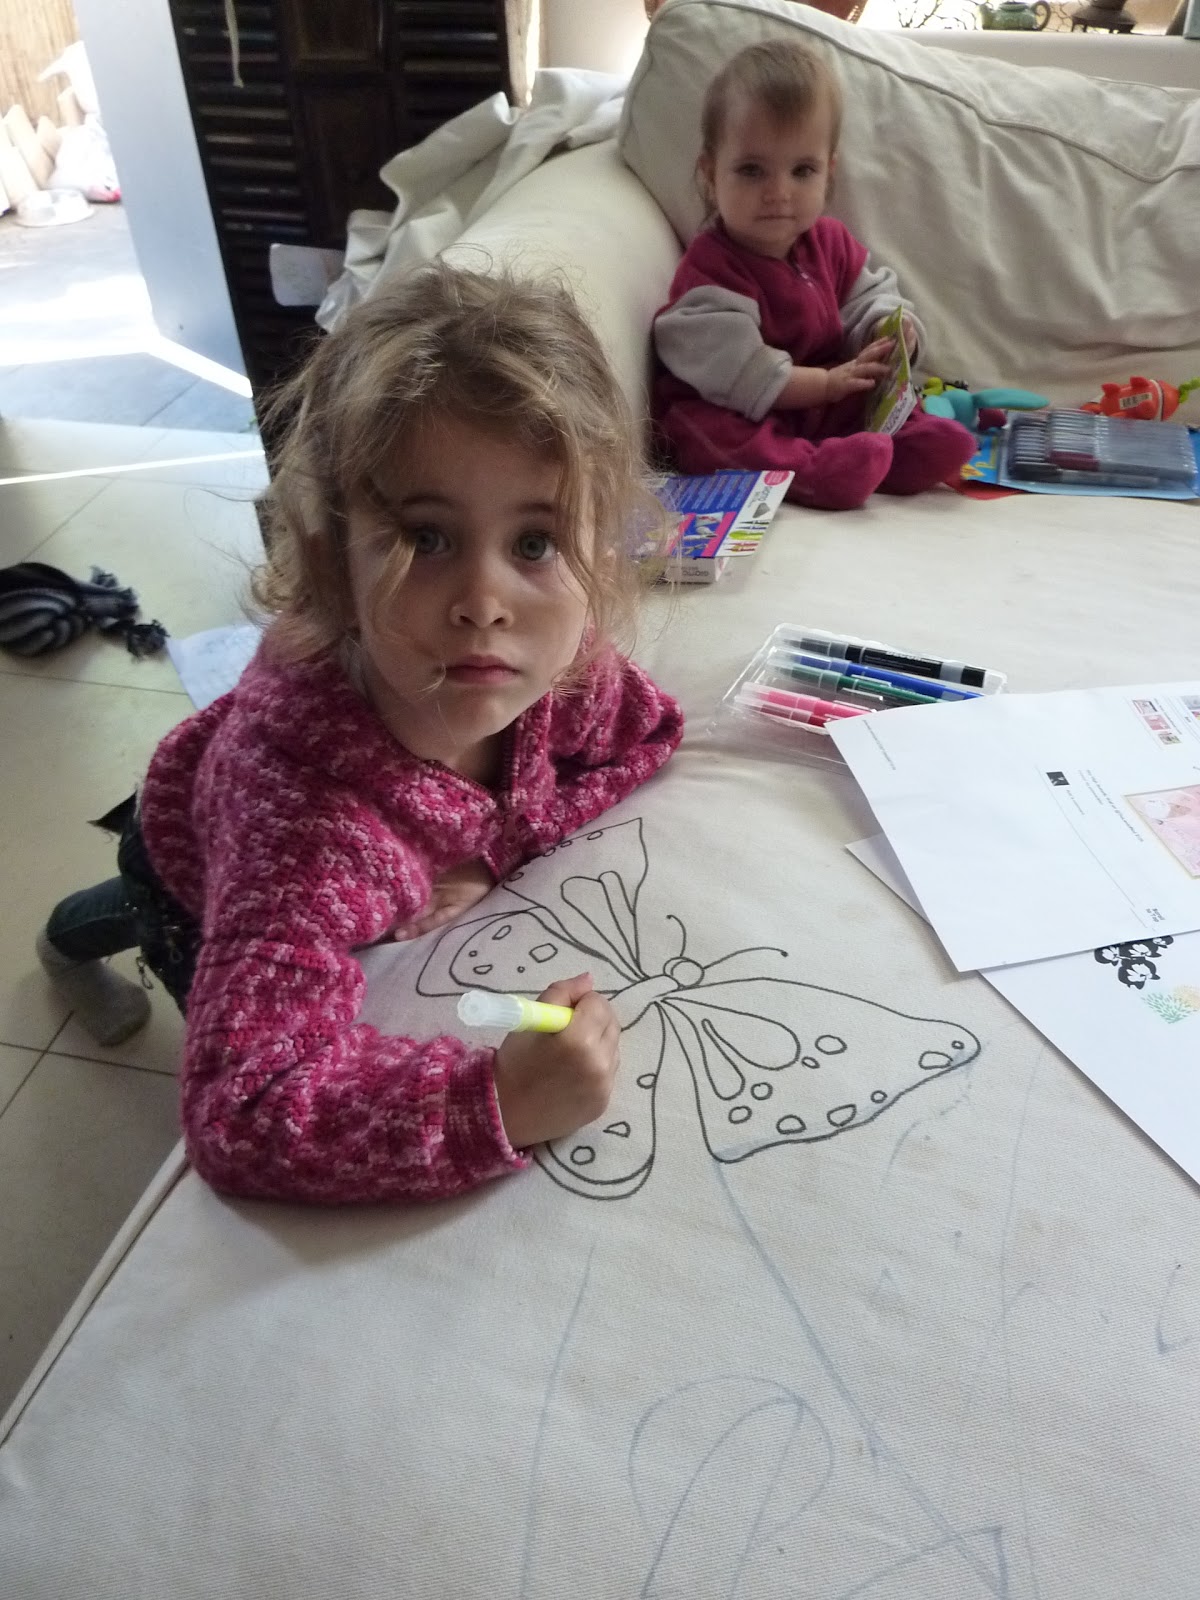
I collected some inspiration and drew outlines for Sierra to color in-a GREAT mommy and daughter activity I may add! And so ,during a week we drew the stains away :) Each dirty spot got it's own drawing cover up and any additional ones that will follow will earn the same treatment-so it's a progressing work of art-our sofa that is


Here is our creative process-


BEFORE
Covering the doodles with a large print of bus trolley art

 I drew the line-art 
 Sierra and Sheluv were responsible for the coloring 
*use water resistant fabric markers
adding more and more illustrations to cover the stains 


What do you say? I think it's pretty neat :)
A couch that is also a piece of art
bear_hugs

Sunday, March 18, 2012

Supakitch + Koralie

Another AMAZING work of art by Supakitch and Koralie
bear_hugs